

 Fun to Sew! Fun to Twirl !
Designer Sandi Henderson surely must rank among the Best children's pattern designers! Claire was my first experience using Portabellopixie patterns , but will not be my last!
Here is what it says on the back cover of the pattern:
This pattern includes 5 options in sizes 6 months - girls 8. Claire is an excellent pattern for beginners to intermediate sewers. Beginners will find the Peasant Top and Dress easy projects to understand and start out with. When you progress or are and adventurous beginner, try the Apron and Petal knot dresses. There are two aprons to play with, so have fun! Fun indeed! Fun to sew and fun to twirl!!!! On a scale of 1 to 10 this dress has twirl power rating of an 8.00 ! Only dresses which are cut on the bias and twirl straight out make the perfect twirl score of 10!
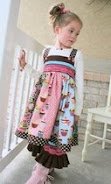
  If you scroll to the bottom of this post, you'll be able to compare the dress which Zoey is modeling to the picture on the pattern cover. The only change I made was adding length to the sleeves. I like the original, but was experimenting with a longer sleeve for the fun of it.
The Portabellopixie Round Apron dress which Zoey is wearing was cut from the size 5 T. Due to the elasticized neckline and sleeve it is fairly forgiving of size and could probably work for a child slightly smaller than Zoey.
 I was a apprehensive about sewing the attached apron band at the bodice seam. I was afraid it would end up looking puckered. Truthfully..... frustration was anticipated! I took the designer's instructional advice to heart and used plenty of pins. I had no trouble and zero puckers!
The tulip applique was my own free hand design, but I would have welcomed a few applique shapes to be included with this pattern. Instead, the directions give ideas and some photos of finished dresses for inspiration.
Keep the applique light and flexible. If the applique is large and near the top 1/3 of the apron, it will not hang in loose gathers as an apron should. This tip is not mentioned in the pattern instructions........probably because it is assumed that most people would have common sense on this matter. I'll admit to a " practice" apron panel......and move onto another subject.
The pattern pieces are printed on extra heavy grade tissue paper, therefore it is easy to trace out the size you need without tearing the tissue! (thumbs up) I love the heavy weight tissue!
Because of 4 variations included, I color coded each variation making it easier to sort though. I marked the Petal Knot dress variation pattern pieces with a red dot, the Peasant dress pattern pieces are marked with a green dot and so forth.
Zoey helped with the color coding and enjoyed learning about pattern pieces. :-)
I enjoyed the instruction booklet and Sandi Henderson's way of illustrating the directions. She includes a drawing with arrows to illustrate which seams are being sewn, making the steps extremely clear at a glance.
There is a mistake on the yardage of the Knot Dress . It calls for 1/2 yard for the skirt and it should be 1 yard. I've only made the sizes 5 and 6 and have not compared the yardage for the other sizes.
Would I make the Round Apron dress again?
YES, but AFTER I make the OTHER variations included in this Portabellopixie Pattern!
Would I recommend the Claire pattern to a beginner?
I would say a person with basic sewing skills could handle any of the variations. The Petal knot dress requires making 2 button holes, top stitching and gathering skills.
The Round Apron version requires gathering, applying bias binding (on the apron) and running elastic through a self casing at the neck and sleeves.
If you understand those skills........you'll have no trouble.
The Peasant dress and Peasant Top require gathering to attach a bottom ruffle and shirring with elastic thread.
To sew with elastic thread:
Hand wind the bobbin with the elastic thread and thread the needle with regular sewing thread. Sew as you normally would and let the elastic thread do the work!
Was this review helpful?


Shop for Children's Patterns