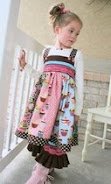
Let's talk "Cool weather". It's just around the corner ya know.
Let's talk "Easy sewing". We need to get it done while juggling life.
Let's talk "One of a kind". You won't find this Indygo Junction Inside Out Jacket on a rack in a department store.
 Jacket......difficult to sew? No Way ! I was nearly doing back flips with excitement over this one! LOOK below at the design. Easy elementary dolman sleeves!
 I chose the brick red and turquoise combo prior to finding the Indygo Junction pattern. The marriage of the sewing pattern and fabric combo are just my style (traditional with a quirky edge)
 Written on the back cover of the Turnabout Jacket by designer Mary Ann Donze says:
This Jacket designed for children ages one to ten years allows for years of wear with turned up dolman sleeves to let down over time.
Its loose, asymmetric style easily adjusts to the growing child. Construct in the upper hip length or by adding the lower bands to extend the jacket to just below the hip.
For an unlined jacket, use any two-sided fabric such as polar fleece, linen, batiks, etc. and finish its edges with fabric binding or serger. Or line a jacket and have two looks in one by creating a fully reversible garment.

Photo showing the simple method of construction for this jacket pattern: Right sides together pin, stitch & repeat.
Don't leave this page just yet........you haven't seen the Finished product.......first things first. :-)
To sum up the construction process for this jacket is fairly simple and mostly can be by looking at the photo above. A section on the bottom edge of the jacket is left open for turning.
Basically the jacket consists of two main pattern pieces plus pocket & button tabs.
1. the FRONT which incorporates the front dolman sleeve.
There is No separate collar to attach because the front simply folds back to create a collar. We end up with a collar without cutting a collar piece! Thank you designer Mary Ann Donze!!
2. the BACK which incorporates the dolman sleeves.
3.Lower bands which allow for using contrasting fabric (which I have done)
4. tabs for the button holes
5. a pocket
Sew the front to the back as in the photo showing the pinned sleeves. Do this for the lining the same as you did for the exterior. You'll have put together two jackets and then will sew them right sides together and turn. Your pretty lining makes it reversible!
 I use this wooden tool to poke the corners out nice and neat. Word of caution: Do not use the tip of your scissors to poke the corners. (don't ask how I know)
The photo with the iron shows the jacket turned right side out and beginning to press the seams.
Once everything was pressed, I top stitched the seams. The pattern does not call for top stitching, but it gives a nice professional look if you do.
Note about top (edge) stitching: Go slow and select a stitch length that mimics Ready-To-Wear top stitching. I gather on a #4 setting and edge stitch on #3 and sew on #2.
I like my thread to match the fabric because a slight wobble in my stitch line won't show. For this girls jacket, I sewed with the bobbin thread matching the lining color and the top thread matching the outside fabric.
See how I Top stitch: with confidence by clicking: here.
 Pocket time: cut the pattern piece and follow directions given. To make life easier for accomplishing a nicely shaped round pocket, sew a gathering length stitch on the edge which you will fold as shown in the above picture. In this case it was 1/4 or 1/2 inch.
Stitch the gathering length line slowly and make it as perfect as possible. This is will become the fold line around the pocket.

Gently use a straight pin to pull the gathering thread to ease the curve.
 Pocket Pressed and ready! The color of the fabric on the above photo is off. Way off!
 I love this product! How did I sew without Quilter's Choice Basting Thread? There are other products which glue fabric, but make sure you use one which will not gum up your sewing machine needle. When dry, this basting glue can be sewn over. It is temporary and washes out.
Here is my version of the Turnabout Jacket by Mary Ann Donze for Indygo Junction .
I seriously doubt finding a jacket similar to this in any department store.
Things to know:
Would I make this pattern again? Yes yes yes!
Does it come in an Adult size pattern too ? Yes it does! Scroll on down to see it
Skills needed:
- concept of putting right sides together and turning
- know how to make a button hole by machine or hand
- applying bias binding to finish the edge of the sleeves (optional)
As stated on the pattern description, it is a style which allows for growing. It is generous in wearing ease. The pattern gives actual finished measurements. (a feature I love and wish all patterns included) You decide how much wearing ease you'd like.
Ideas:
It does not require fleece or interfacing. I used the Home Dec weight 100% cotton fabric from the Amy Butler August Fields collection. The two layers (exterior and lining) make this a nice mid weight jacket. Perfect for mid climate Winters of the southern states or a Fall/Spring jacket in the colder states.
I imagine this pattern could easily accommodate fusible fleece and machine quilting for making a heavier jacket.
Click here for the Pattern review for Zoeys coordinating pants. I used this pattern: The Sophie 3-way Pants by Patty Young for Modkids.
 Using the pocket fabric, Sunrise- seafoam from Amy Butler's August Fields collection

On my extended To Do List:
sew myself the Adult version of this same pattern: The Inside Out Jacket


That is so cute! I know my Girly- girl would love it. And I'm thinking I might need one for myself as well. Would it be terrible if I made matching jackets for us?
ReplyDeleteBy using three fabrics, you could swap them around and use the same fabrics in the opposite way.
ReplyDeleteSo glad you posted these pictures!!! Lynette, I have the same idea as you, and I'm going a step further by making one for my mom as well.
ReplyDeleteGlenna I think That's another to keep in mind for me! You did a superb job!
ReplyDeleteI do not have any girls, but I LOVE LOVE LOVE this jacket. I wished I was crafty enough to make one for myself :)
ReplyDeleteGlenna you are AWESOME! I love this jacket, may need to get the adult sized one for Kate and I!! Your tutorials are so GREAT, they always make me feel like you are right here showing me how! GREAT JOB!
ReplyDelete~Michele
lINDO! BEIJOS!
ReplyDeleteThat turned out so cute, Glenna!
ReplyDeleteYou are one talented lady! Great directions, too! I love it when somebody breaks down the directions like you did:)
ReplyDeletethat is a really cute jacket.
ReplyDeleteSuch a fun, cute jacket! My jaw dropped when I saw it! Your craftsmanship and talent is so inspiring! Thanks much for sharing!
ReplyDeleteThank you for stopping by my blog! What an adorable jacket! I have always been a little scared of sewing (partly because I never learned) but you make it look so fun, I am going to have to learn the skill :) I hope you keep stopping by and have a great weekend!
ReplyDeleteThe jacket is so cute! Great fabric choices as well! I wanted to stop in and say hi and post a link to my finished grids and grommets bag...
ReplyDeletehttp://crissybell.blogspot.com/2009/09/grids-and-grommets-bag-indygo-junction.html
Hey,
ReplyDeleteThat is super cute! I usually shy away from Indygo Junction patterns but I think I might just have to seriously think about this one. I also LOVE the color combination you chose. Very chic and aqua and red a so hot right now. Totally cool. I'm stopping by to share the SITS love too. Happy SITS Saturday!
Anna
Hi, Glenna. Happy SITS Saturday Sharefest.
ReplyDeleteYou are so talented. I don't sew but sometimes wish I did. I admire your skills!
I love this jacket and would wear it myself with pride! Thank you for following my blog. I look forward to following yours as I am a fledgling sewer but have inherited my grandmother's sewing machine, and would really like to do her proud by creating something beautiful. I love anything vintage and would like to be able to sew from vintage patterns. Sending smiles.
ReplyDeleteThanks for demonstrating the ease of the pocket! I was googling for how to ease stitch for the pocket on the Frida tunic from Modkid and when your site popped up I know it would have my answer. =)
ReplyDeleteOh my goodness. These are beautiful! Thank you for the great sharing!
ReplyDeleteMotorcycle Jackets