Wednesday, July 29, 2009

My Amy Butler Mini Dress pattern review

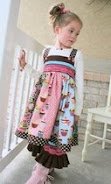
I've sewn the Amy Butler Mini Dress, Tunic & Top pattern in both the dress length as well as the short top versions. Jennifer, my daughter -in-law is wearing the Short Top sewn out of Midwest Modern 2 Honeycomb- fuchsia.


It isn't surprising the Amy Butler Mini dress, top and tunic pattern has been popular.
First off, if you are like me, you like designs which only consist of a few pattern pieces! Let's face the facts: We are B U S Y, but we still enjoy our sewing projects! Simple designs means we have a better chance of actually finishing the project!

This dress has 4 pattern pieces and an optional pocket piece. FOUR. Count em. Only Four pieces!


Select your size by the fullest part of the bust measurement and you should be fine with this easy fitting design.
I made the dress exactly to the pattern for my size. It fit a little low under the arms but looks nice with a little T-shirt. When I sewed the Short Top version, I shortened the length of the shoulder straps about 1/2 inch which pulled the bodice up.

Probably there is a more professional technique for altering the fit under the arms, but trimming a little from the shoulder seam area was quick and painless.
.


The pattern calls for cute little pleats in the shoulder straps. Wanting more coverage on the shoulders, I skipped the step which called for making the pleats. This resulted in the straps being a tiny bit wider which is noted in the photos.
On top of that, I saved a couple of minutes in construction time, which results with more time to blog!

If you scroll back to the top of the page, you notice the inverted box pleat in Jennifer's top. Compare it to the picture on the pattern cover.

The pattern calls for the box pleat to be stitched with a temporary basting stitch. Once the bodice is attached to the dress front panel, the basting stitches are to be removed.

Because I wanted to close a few inches of the box pleat , I stitched instead of temporarily basting.
The result can best been seen in the photo below. The box pleat could be stitched closed for several more inches if desired. It would change the look of the dress, but is something to consider for added variation.


The Amy Butler Mini Dress pattern calls for a invisible back zipper. If you've never put in an invisible zipper, you'll be pleasantly surprised as to how simple it is! This is an easy garment to "give zipper installing a whirl". Follow Amy's instructions.

Typical to this Designer, this pattern has detailed instructions which are well written. Most likely you will do a great job! If it is a 1st zipper application for you, be sure to stop back by and let me know. I'll give you a Hi Five and shout out "Way ta go Sista"

BUT..... if you want to be wild and crazy, don't use a zipper in this top.

Here is how I did it:


Complete all of the steps up to the point of putting in the zipper. Sew the back bodice to the bodice lining right sides together and insert a button loop between the bodice exterior and lining and the top edge.


The center back seam below the bodice is sewn and pressed open the same as if you had put in a zipper. Read the pattern instructions and complete the back seam in the normal manner.

Do you like my Dorset Button? I found a great tutorial for making them at Craft Stylish!
These little babies are wonderful to make while watching TV!

The embroidery floss on this button..... is.............Vintage. It took 45 minutes to find my floss which had been stored in the bottom of a rubber maid container for many many years! Goes to show........never throw stuff away!

Will I make this pattern again? YES
Would I recommend it for a beginner? YES

Personal ideas: Make the tunic length to wear over a T Shirt later on in the season or turn the dress length into a jumper. Any questions? send me an email! Let's talk sewing! :-)

http://www.yourfabricplace.com


Tuesday, July 21, 2009

How to Sew a Purse - Grids & Grommets by Indygo Junction

Your Fabric Place


I fell in love with this pattern when a friend was carrying the one she made. If I could have stolen it, I would have!

Since she would not give me hers, I made my own and am sharing what I learned with you!
Enter to Win a Grids & Grommets sewing pattern by Indygo Junction!
Contest details at the end of this page.

The first step to creating your own Grid & Grommets bag is deciding which size and style option suits you. I chose the large, strip bag version. Sewing is my art form. I Pick fabrics which reflect my mood & personal style. You can see from this picture which fabrics I decided on. All of these strips are from Amy Butler's Daisy Chain Collection.

The AccuQuilt Go fabric cutter made the task of cutting the 2 1/2 inch strips a quick process, but you could use your rotary cutter & mat method if you don't own a AccuQuilt Go. Either method, will produce a fun and practical use of scraps.

What I've learned about the Indygo Junction Grids and Grommets purse pattern:
Definition of Practice Run according to Glenna's sewing dictionary; 1: goof-up, 2: mistakes in sewing usually caused by not following directions of the Pattern Designer
__________________________
_________________________________________
The pattern does not call for interfacing in the top panel (where the grommets are attached). Trust me.......there is a reason for not adding interfacing to the top band. Only the main portion of the Grommet bag is interfaced with fusible fleece.

When I made my
practice run bag, I used the same fusible fleece to interface the top panel. All looked well until it was time to attach the grommets.
Because of the extra thickness, I could not sandwich the front and back of the curtain grommets into place. Learn from my mistake.....don't use fusible fleece in the top band.
Note added on Sept 9,2009: I now use a heavy stabilizer interfacing in the top band. I fuse it to the exterior band fabric. The heavy fusible interfacing has stability without the thickness of the fusible fleece. I have no problem attaching the grommets thru the interfaced top bands.

Once your bag is sewn and pressed well, baste the lining of the top band to the exterior top band. This simple step is important in assuring the lining hangs pretty inside your bag.

Yes, you could press and pin the lining in place, however basting is more secure. We want the lining fabric to stay in perfect position when we marking and cutting the holes for the grommets.
Remove the basting threads after your bag is finished.


The grommets are extremely easy to "install" through two layers of fabric (no tools required) Dritz includes a template which makes measuring and marking a breeze and is actually quite fun. Let's not forget the Wow factor something as GRAND as this creates! Thanks Indygo Junction for giving us this Wow factor pattern!!
Once you've traced the circle for the cut-out, machine stitch to reinforce. The Grommet will cover your reinforcing stitches. Stitching to reinforce is not mentioned on instructions.

I also ran a thin beading of Fray Check around my marking line to prevent fraying. Once my bead of Fray Check was dry, I cut out the hole. This bag is large enough to load down with books, toys, etc. Taking steps to reinforce the grommet holes is (in my opinion) a good idea. The large version of the Grids and Grommets bag is wonderful for multi tasking! . It is a purse which could multi task as a diaper, shopping, or even a book bag, yet it looks stylish for an everyday bag. The final photo shows the straps pulled through to allow extra length for wearing slung across your chest. Great option when we need two free hands and a secure purse!


Monday, July 13, 2009

Fabric Flower & Amy Butler Field Bag combo

What to do when a storm knocks out your cable and you can't watch the new episode of Army Wives?
Make a Shabby Chic Fabric Flower! I attached it to my Field Bag.

I know.....I didn't use the same fabrics as in the bag. I was feelin the need to be a little unpredictable.
See my Amy Butler Field Bag & Tote pattern review and tutorial here.

Friday, July 10, 2009

My first Amy Butler Field bag turned out nice!

Would I sew this pattern again? YES

I finally found a block of time to sew myself a Field Bag and want to share my experience of it.
Let's start off by saying what you probably already know: It is a huge bag.

Finished size is 18 1/4 inch at the top of the bag and is 27 1/4 inches at the widest point. The Field bag is 15 1/2 inches tall (not counting the handles) x 5 1/2 inches deep.

It is named Field Bag for a reason! You'd love it for multi tasking as a shopping bag, diaper bag, beach bag, carry on and etc. Ideas are swimming around in my head to sew a matching garment bag from the Seams to Me book by Anna Maria Horner.

Wanting to use this as a carry-all type bag, I decided to go all the way and make the zipper top BAG.
This sewing pattern has two versions from which to choose. The Field BAG has a zipper and the TOTE has an open top without a closure. Both choices are the same size with the exception of the top zipper area.

This picture shows how the zipper is installed. I wish I could have found a better color match because the sport zipper has wide exposed tape. White is OK, but try to find a closer match when you make your bag.
Amy Butler's zipper instructions make this easy. This is what the top zipper panel looks like when it is ready to attach to the yoke of the bag. This photo shows another little trick of mine.

Somehow I ended up with a pair of hemostats. I don't remember when they became part of my sewing notions, but I use them rather often. (no, they do not have dried blood on them!) In this case, my cord had slipped down into the tube and I needed to fish it back out. (yes, I know hemostats are typically used to clamp the cord of a newborn) :-)

Hemostats make a great sewing notion!


The directions for making the piping are good. You won't have any trouble doing it even if you've never made piping before.


If you look real close, you can see the bump caused by the piping cord. If you have pinned accurately, this step is easy peasy! I hold my finger next to the bump to keep it tight to the side of the zipper foot.

When done, turn the fabric & check to see if you need to do any touch up.Looking at the bag at this stage shows the simplicity of this pattern design.

Another tip while it is fresh on my mind: Reinforce the seam which attaches the handles to the bag even though that step is not in Amy Butler's instructions. I like to play on the safe side when it comes to straps. It only takes a smidgen more thread and time to reinforce those handles!


I found the instructions to be well written for this step and the pattern pieces were accurate. The bottom panel fit nicely!

OOPS!
Here is what my first try looked like when sewing the front of the bag to the back of the bag (my sides seams did not line up.Remove stitches and do it again....................Mistake corrected.......I can live with this. On to the next steps of making the lining etc.

This bag moved along quickly for me until attaching the top zipper panel to the bag yoke. It isn't hard, but it took some patience because of working a a tight area.
I would advise beginners to make the Field Tote option,which is the same as the BAG, but without a zipper.
As you can see from my zipper photo, making the top zipper panel was very quick and easy. A beginner could do it. I'm not a Master Seamstress . I did it and you can too.

If you'd rather not spend time on the zipper, simply sew the Tote. :-)
Would I sew this pattern again? YES

Tuesday, July 7, 2009

Vogue Vintage Style Dress sewn with Amy Butler Fabric


This dress is timeless! Vogue 2902

The sewing pattern is a 1950's Vogue re release and the fabric is Amy Butler's Optic Blossoms.


Erin, who is a 3rd year law student has been sewing since she was a child. There is no doubt that her sewing experience shows! I predict she will be the best dressed lawyer in the court room if this dress is an indication of what her sewing talents are capable of.


If we all had a kitty as smart as this, maybe we ALL could get more sewing done in a day!
I'm sitting here thinking of how I could persuade Erin to send Fitzwilliam to stay with me long enough to get a few projects on my to do list completed.
Hmmmm?


Saturday, July 4, 2009

Happy 4th of July!

Have Fun today! Be Safe! Remember our Freedom and how we have it! Pray to God for our Troops and the well being of this Country!

I bow my head and am not afraid to say "God Bless America"

Thursday, July 2, 2009

Handmade Fabric Shopping Cart Cover

I love sharing the talented skills of fellow sewers and this 'find' is definitely worth sharing!

Warning:
If you put a cute baby in one of these cheery cart covers, you'll be stopped in every isle by strangers admiring your cargo. Allow extra time for shopping!


The Shopping Cart Covers are handmade by the owner of Bella Morgan Boutique and can be found at www.bellamorganboutique.com If you don't wish to make your own, browse through her shop and see what you find to your liking. If you wish to sew up one of your own, be sure to send a picture of the finished product!


Safety Clip................Excellent

Beautiful fabrics......Excellent

Happy baby.............Priceless


Turquoise fabric from Amy Butler's Daisy Chain Collection
Wildflowers- turquoise